Hay, G., (1999) Ancient Tribe, Project: Paperclay Sculpture, Australian Ceramics & Pottery, 1999, .1, (2) p. 52-56 Reproduced with the permission of Express Publications.
Ancient Tribe, Project: Paperclay Sculpture
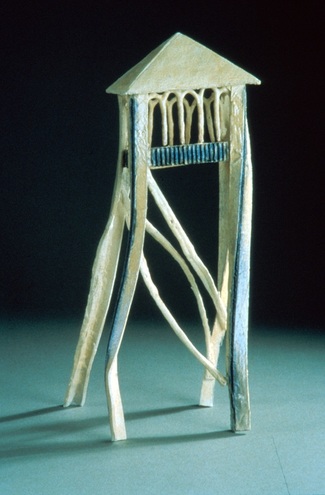
This sculpture, by Graham Hay, was inspired by drawings of old buildings around inner-city Perth. The original was created five years ago with paperclay he made himself, but you can now buy paperclay in bags, like conventional clay and for a similar price, through retail clay suppliers in most countries [Ed].
MATERIALS
1 bag earthenware paperclay.
Pencil, ruler and large sheet of paper.
Rolling pin or plastic pipe for rolling out sheets of paperclay.
Sponge.
Sharp craft or kitchen knife.
Thick art paintbrush.
Plastic ice-cream container.
3 building bricks.
A board at least 60 cm (24in) square for moving the clay parts about.
Kiln for firing, which is at least 60cm (24in) high inside (if it is not, reduce the scale of the work accordingly).
Construction will require two days, about a week apart, to allow the paperclay parts to completely dry before 'gluing' the work together.
The first day is for collecting the materials required and making the parts out of paperclay.
The second day is to 'glue' the parts together before firing. Paperclay dries to a material which is much stronger than conventional dry clay.
Therefore it is extremely important that you make sure the parts have exactly the right shape and texture before putting them out to dry in the sun.
Day 1 : Construction
Making the Pillars
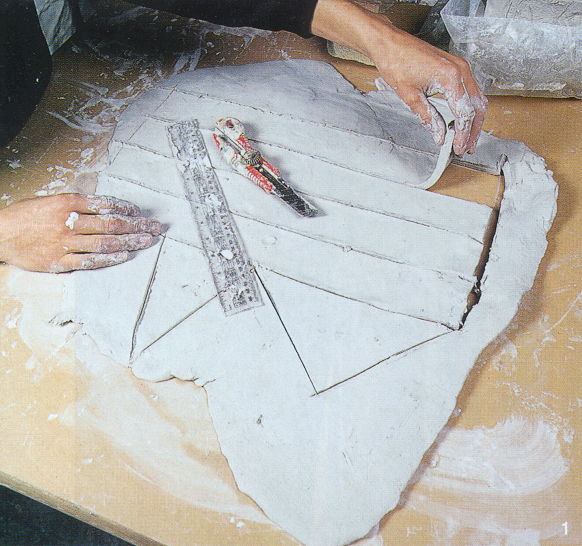
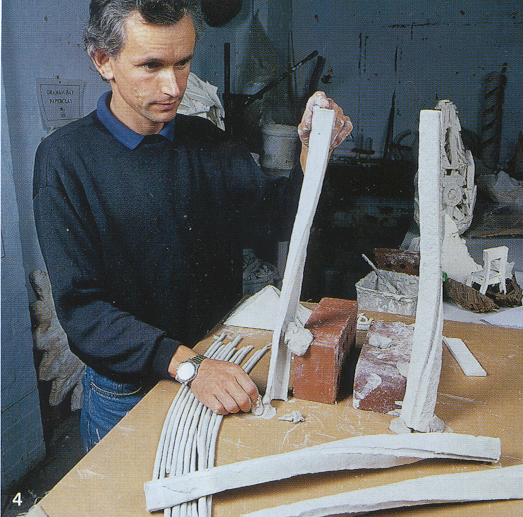
Roll out a ¾ cm-thick slab of paperclay at least 60cm x 40cm from which to cut the tower legs or pillars. If you are joining two slabs of soft paperclay then coat both surfaces with a slip made from paperclay. Cut five rectangles measuring 54 cm x 6 cm. (One of these is a spare just in case of an accident.) These are slightly thicker than the original artwork to give greater strength. Cut a 1/2 cm-deep crease (no more than half way through) down the length of each of these slabs. Turn each of them over and bend each one away from the crease to create an 'L' end profile on each pillar. Use the ruler to remove any finger indentations.
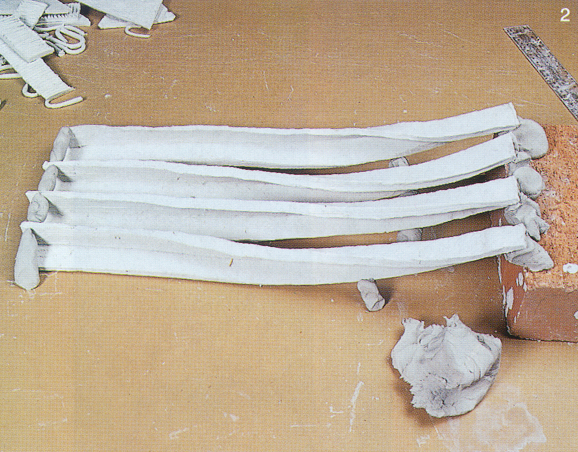
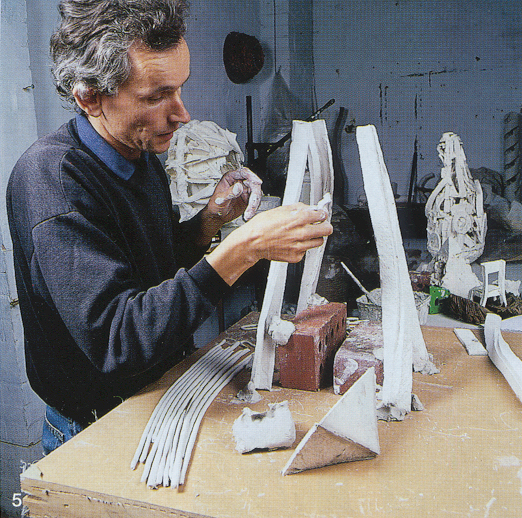
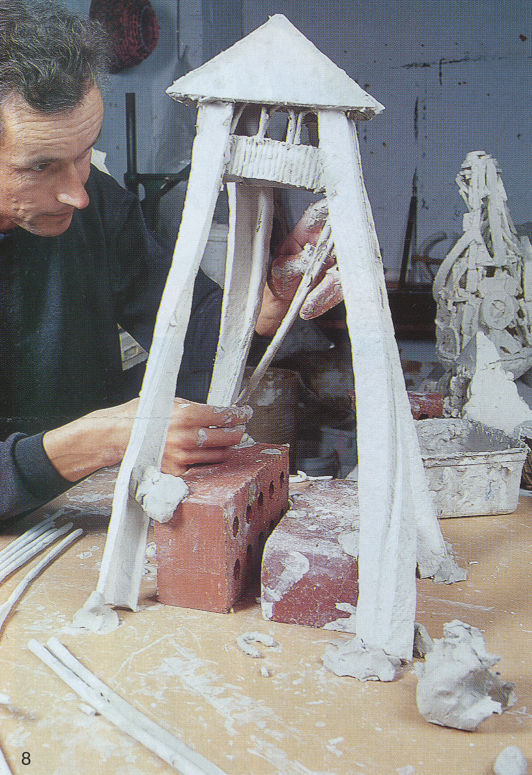
Drape the paperclay pillars over a brick (as illustrated) to ensure they dry in the arranged twisted shape. Along their length they should each be twisted a quarter turn (90 degrees) and have a gradual bend from the table surface up to the brick top. Use small pieces of soft paperclay to support them, keeping them in the correct position and preventing them from straightening during drying.
Making All the Other Parts
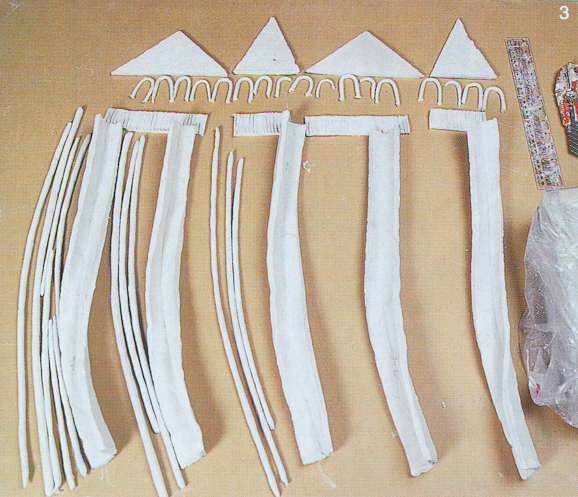
Roof: The front and back panels of the roof are two, 21 cm x 15 cm x 15 cm triangles, cut from a 1/2 cm-thick paperclay rolled slab. The left and right panels of the roof are two, 12 cm x 15 cm x 15 cm triangles cut from the same slab. The 15 cm-long sides of the triangles (those which will be joined together later) are trimmed on a 45-degree angle so that they will make a right- angle join.
Crossbeams: The crossbeams are two, 4cm x 16cm and two, 4em x 7cm rectangles cut from the same slab. The texture is added by repeatedly pressing the ruler edge into the paperclay.
Arches: The arches are 5cm 1/2Cm hand-rolled logs of paperclay bent into the desired shape to dry. Line them up next to each other, touching, so that they do not straighten during drying.
Pillar Braces: The pillar braces are rolled out on a smooth surface using the palms of both hands and only light pressure from the fingers. They should measure 50 cm x 1 cm and be bent into the desired shape to dry. Make at least 10 rods so that you can later pick the strongest ones.
Firing Tray: To create a firing tray, roll out a 112cm-thick slab, approximately 30cm square. Lay out all the parts and scraps on a board to dry out completely. The scraps will become the paperclay slip on day 2.
Day 2: Assembly
To make the slip, the dry, leftover paperclay from day 1 is placed in boiling water in an ice-cream container and left to soak for 30 minutes. Pour off most of the excess water, then mix the remaining water and paperclay to make the slip. Water can be mixed in later, until the slip is runny (ie the consistency of olive oil) for joining. If the slip is too thick the joins will fail.
Paperclay joining techniques are different to traditional clay techniques. When joining any soft or dry paperclay, use an excess amount of runny slip on both joining surfaces. This point cannot be emphasised enough, particularly if at least one joining surface is dry paperclay. It is best to return to each joining surface again and again with slip to build up a gooey mess on each surface.
After generously coating all joining surfaces with slip, push them together, hold and count slowly to 10, then leave them alone. You need to leave them for at least a couple of minutes to allow the dry clay to suck the moisture out of the join and make it firm. Excess slip can be wiped away after joining but do not fiddle with the joins.
Tidy up the joins carefully with a damp sponge or paint on extra slip when they have dried to the lighter colour of dry paperclay. Painting slip on or around wet joins will wet the clay, and weaken the join. Remember: join and leave.
'Glue' the four roof sections together after painting all seams generously with slip. Small balls of soft paperclay dipped in slip are pushed inside at each seam. These will support the sections and provide some flexibility while attaching the fourth section and squaring up the roof.
Allow the roof to dry while organising the pillars and the crossbeams.
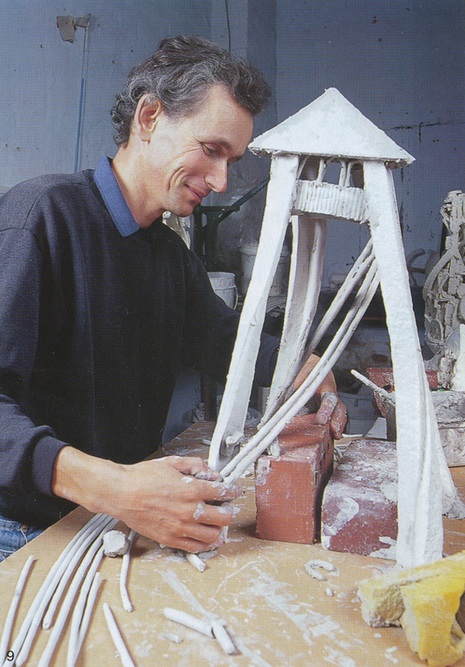
Arrange the pillars into the desired position and then prop with bricks. Small balls of clay dipped in slip will stick to most surfaces and hold the pillars in position.
Generously coat the top of each pillar with slip, and then attach a ball of soft paperclay, which has been dipped in slip, to the top of each pillar.
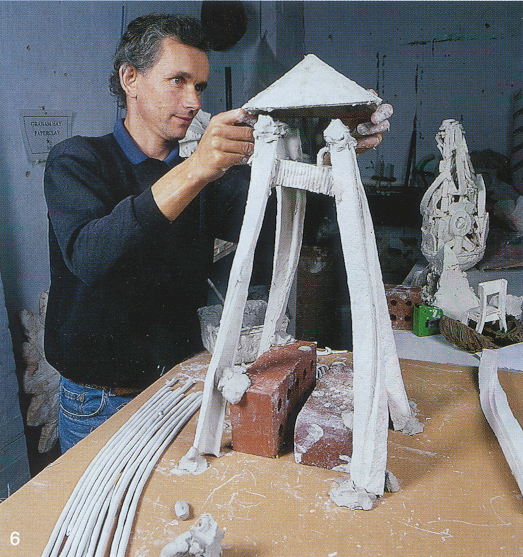
Coat the joining points on the underside of the roof with slip and push the roof down firmly onto the pillars.
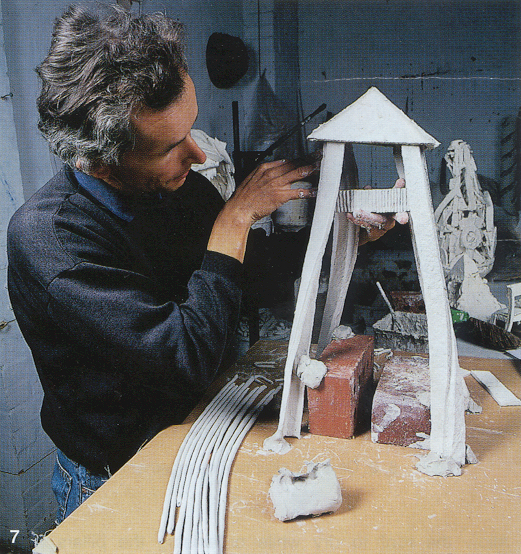
Trim the crossbeams' lengths to fit behind the pillars. Attach the crossbeams with the same technique used for attaching the roof to the pillars.
Attach the arches.
Glue the pillar braces together in pairs with slip, then attach them to the pillars with plenty of slip and soft clay.
Remove the brick supports and allow them to dry completely.
Pick up the finished work by the roof to move it.
Finishing
Place the final work on the dry firing tray. This will prevent the pillars catching on the kiln floor and the work being torn apart as it shrinks during firing.
Fire only once, right up, to the maximum temperature, to make the clay as strong as, possible. As a guide, use the paperclay manufacturer's recommendations for glaze firing temperature (usually on the bag the paperclay came in). Decorate with dark blue acrylic paint. As the work is delicate, place it up high away from elbows and small hands. Enjoy.
Graham Hay lives in Perth, runs community workshops in his inner-city studio and taught at Edith Cowan and Curtin Universities. His next exhibition opens at Mura Clay Gallery, Newtown, Sydney on 20 August 1999 from 6.30 to 8.30pm. For commissions or enquiries, Graham Hay can be contacted here
Reproduced with the permission of Express Publications: Hay, G., (1999) Ancient Tribe, Project: Paperclay Sculpture, Australian Ceramics & Pottery, 1999, .1, (2) p. 52-56
